Esysense Motion Sensor Products — Complete Installation & Troubleshooting Guide (2026)
📍 Noida
🕐 1 day ago
👁 105 views
INR 0
Description
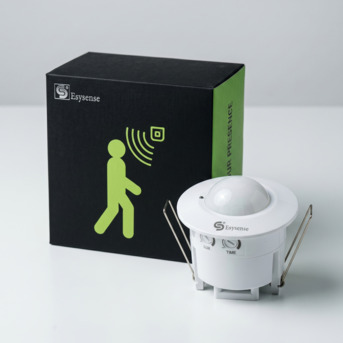
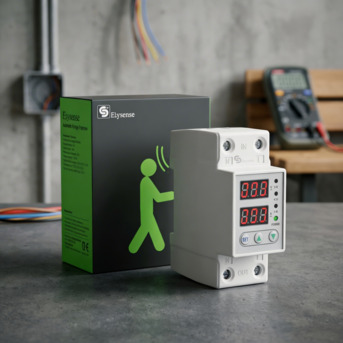
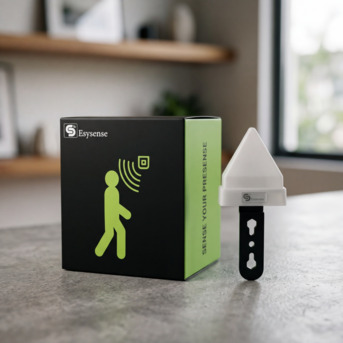
Quick Answer: Installing Esysense motion sensor products: plug-and-play products (sensor bulbs, hinge lights, rechargeable lights) require no tools or electrician — replace the existing bulb and leave the wall switch permanently ON. Hardwired products (panel lights, tubelights, downlights, standalone sensors, staircase controllers) require standard mains electrical connection — a licensed electrician is recommended. For all products: never connect to a dimmer switch; always leave the wall switch permanently ON. This guide covers step-by-step installation for every product category and a 14-problem troubleshooting table. Pre-Installation Checklist — All Products 1. Power off: isolate the relevant circuit at the MCB before touching any wires. Verify with a non-contact voltage tester. 2. Fitting compatibility: E27 (screw) or B22 (bayonet) for bulbs surface ceiling with wiring for panels existing T8 holder for tubes false ceiling with 90-120mm depth for downlights. 3. Switch type: motion sensor products require a standard ON/OFF switch left permanently ON. NOT compatible with dimmer switches, timer switches, or two-way switching. 4. Wiring identification: Live (brown or red in India), Neutral (blue or black), Earth (green/yellow). Use a circuit tester if unsure. 5. Product manual: every Esysense product includes a printed installation guide. Read model-specific wiring diagrams before proceeding. Bottom line: The most common installation mistake across all motion sensor products: leaving the wall switch in the OFF position (which kills power to the sensor) or connecting to a dimmer switch (which causes flickering or failure). The wall switch must be ON permanently. Installing Motion Sensor Bulbs — 8 Steps (No Tools, 5 Minutes) 1. Switch the wall switch OFF. 2. Remove the old bulb — anticlockwise (E27) or push-and-rotate anticlockwise (B22). 3. Inspect the socket — clean if necessary, confirm center contact is not recessed or corroded. 4. Insert the Esysense sensor bulb — clockwise until snug (E27), or align pins, push, and rotate clockwise until it clicks (B22). 5. Switch wall switch ON — leave permanently ON from this point. 6. Allow 10-30 second startup calibration — brief flash or dim glow is normal during calibration. 7. Test: walk away from detection zone, wait 10 seconds, walk back in — bulb should illuminate within 0.5-1 second. 8. Day/Night test (LDR models): cover the sensor window with your hand in a lit room — bulb should illuminate. Remove hand — bulb should switch off after delay. Installing Motion Sensor Panel Lights — 7 Steps (Licensed Electrician Recommended) 1. Isolate circuit at MCB. Verify power off with voltage tester. 2. Mark mounting position on ceiling. Drill and insert appropriate wall plugs for ceiling material. 3. Route mains cable to mounting position, leaving 200-250mm free for connection. 4. Connect: Mains Live (Brown/Red) to Panel 'L' terminal Neutral (Blue/Black) to 'N' Earth (Green/Yellow) to Earth symbol. Tighten all terminals firmly. 5. Mount panel to ceiling. Screws should hold the panel flat against ceiling with no gaps. 6. Restore power and test — walk into zone, panel illuminates. Leave zone, verify auto-off after delay. 7. Adjust sensitivity and delay potentiometers on the driver unit if needed (accessible from panel edge or rear). Installing Motion Sensor Tubelights — T5 Ballast Bypass (Licensed Electrician Recommended) The critical step is bypassing the existing ballast — the LED tube connects directly to mains AC, not through the ballast: 1. Isolate circuit at MCB. Remove the old fluorescent tube. 2. Disconnect the ballast from the end-cap wiring. For single-ended bypass (most common): connect 3. Mains Live to one end-cap holder terminal, Mains Neutral to the other end-cap holder terminal. Consult the Esysense T5 wiring diagram for the specific model's bypass method. 4. Insert the LED motion sensor tube — align pins with end-caps and rotate 90 degrees to lock. 5. Restore power and test. CRITICAL: Never install the LED motion sensor tube with the ballast still in circuit — this will cause immediate damage to the LED driver inside the tube. Installing Standalone Sensors — Universal Wiring Principle All standalone PIR, microwave, and photocell sensors wire in series with the controlled light's Live wire: 1. Mains Live → Sensor 'L-IN' terminal 2. Sensor 'L-OUT' terminal → Light fixture Live terminal 3. Mains Neutral → Light fixture Neutral (direct, bypasses sensor) 4. Mains Earth → Light fixture Earth (direct, bypasses sensor) 5. Multiple lights: wire all lights' Live in parallel to sensor L-OUT — as long as combined wattage is within sensor load rating (typically 1000-2000W). One sensor controls all lights in a room simultaneously. 6. Photocell: cut the Live wire of the outdoor light's supply cable and connect the two cut ends to photocell L-in and L-out. Mount sensor in weatherproof enclosure with sensor window facing open sky — not toward the light it controls. Sensor Settings — Sensitivity, Delay, LDR 1. Sensitivity (SENS) (i) Adjustment: Small potentiometer on sensor or driver (ii) Clockwise: Increases detection range (iii) Anticlockwise: Decreases range and reduces false triggers (iv) Recommended Starting Point: Middle position (50%) and adjust as needed 2. Time Delay (TIME) (i) Adjustment: Potentiometer labelled TIME or DELAY (ii) Clockwise: Longer auto-off delay (iii) Anticlockwise: Shorter delay (iv) Recommended Starting Point: Middle position, then adjust according to the space 3. LDR Threshold (LUX) (i) Adjustment: Potentiometer labelled LUX or LDR (ii) Clockwise: Activates at higher ambient light levels (iii) Anticlockwise: Activates only in near-darkness (iv) Recommended Starting Point: Indoor: Maximum clockwise Outdoor: Middle position Recommended Delay Settings by Space (i) Corridor: 1–2 minutes (ii) Bathroom: 3–5 minutes (iii) Office Cabin: 10–15 minutes (iv) Meeting Room: 10 minutes (v) Car Parking Bay: 3–5 minutes (vi) Storeroom: 2–3 minutes (vii) Staircase: 2–3 minutes (viii) Balcony: 2–3 minutes Troubleshooting — 14 Common Problems and Solutions 1. Bulb or Panel Does Not Turn On (i) Most Likely Cause: Wall switch OFF, MCB tripped, or wiring fault (ii) Solution: Ensure wall switch remains ON, check MCB, and verify wiring connections 2. Light Stays On Continuously (i) Most Likely Cause: Continuous movement in detection zone, delay set to maximum, or nearby heat source (ii) Solution: Clear the detection area, reduce delay setting, and check for heaters or sunlight exposure 3. Light Switches Off While Occupied (i) Most Likely Cause: Sensitivity too low, delay too short, or PIR performance affected by high temperature (ii) Solution: Increase sensitivity, increase delay, or upgrade to a radar sensor 4. False Triggers When Nobody Is Present (i) Most Likely Cause: Ceiling fan
Similar Ads
Esysense Smart Lighting — Complete Product Ecosystem Guide For Indian Homes & Offices
INR 0

LoRaWAN & IoT Street Lighting - Wireless Control Systems Explained India (2026)
INR 0

INR 6999, Looking For TVS CC 232 Currency Counter? Shop Now
INR 0

Motion Sensor Light — The Definitive Buyer's Guide For Indian Homes & Offices (2026)
INR 0
Motion Sensor Bulb Vs Panel Vs Tubelight Vs Downlight — Which Is Right For You? (2026)
INR 0

Energy Monitoring Systems For Lighting - How To Track & Cut Power Usage India (2026)
INR 0
🛡️ Stay Safe
- ✓ Meet in a public place
- ✓ Inspect before paying
- ✓ Never pay in advance